⚡ iOS Labs Kit • $49 One-Time

How to build your own
iPhone app from scratch.

Build and ship your first iPhone app. No coding experience needed. We dug through Apple's actual documentation so you don't have to. Sixteen modules: SwiftUI, serverless backends, Firebase, AI with Claude, widgets, push notifications, and ASO. Comes with a working SwiftUI starter project, a step-by-step App Store submission walkthrough, and a rejection fix reference.

📅
Built to be completed in one focused day. Sixteen modules, about 15.5 hours total. Start from scratch. Submit to the App Store by the end of the day, with a real backend and AI features ready to add.
16Modules
~15.5 hrsTotal time
1 dayZero to App Store
$49One-time, yours forever
iOS Labs Kit
$49 USD
One-time purchase • Lifetime updates included
Everything included
SwiftUI starter project (Xcode-ready)
16 step-by-step guided modules
App Store Connect full walkthrough
Screenshot & metadata templates
12 App Store rejection fixes
Cloudflare Workers serverless backend
Firebase auth, Firestore & storage
AI features with Claude integration
StoreKit monetization guide
Xcode build error reference
Apple Human Interface Guidelines digest
Lifetime updates as iOS evolves
🔒 Secure checkout via Stripe
Already a member? Access your kit →

What you'll be working with
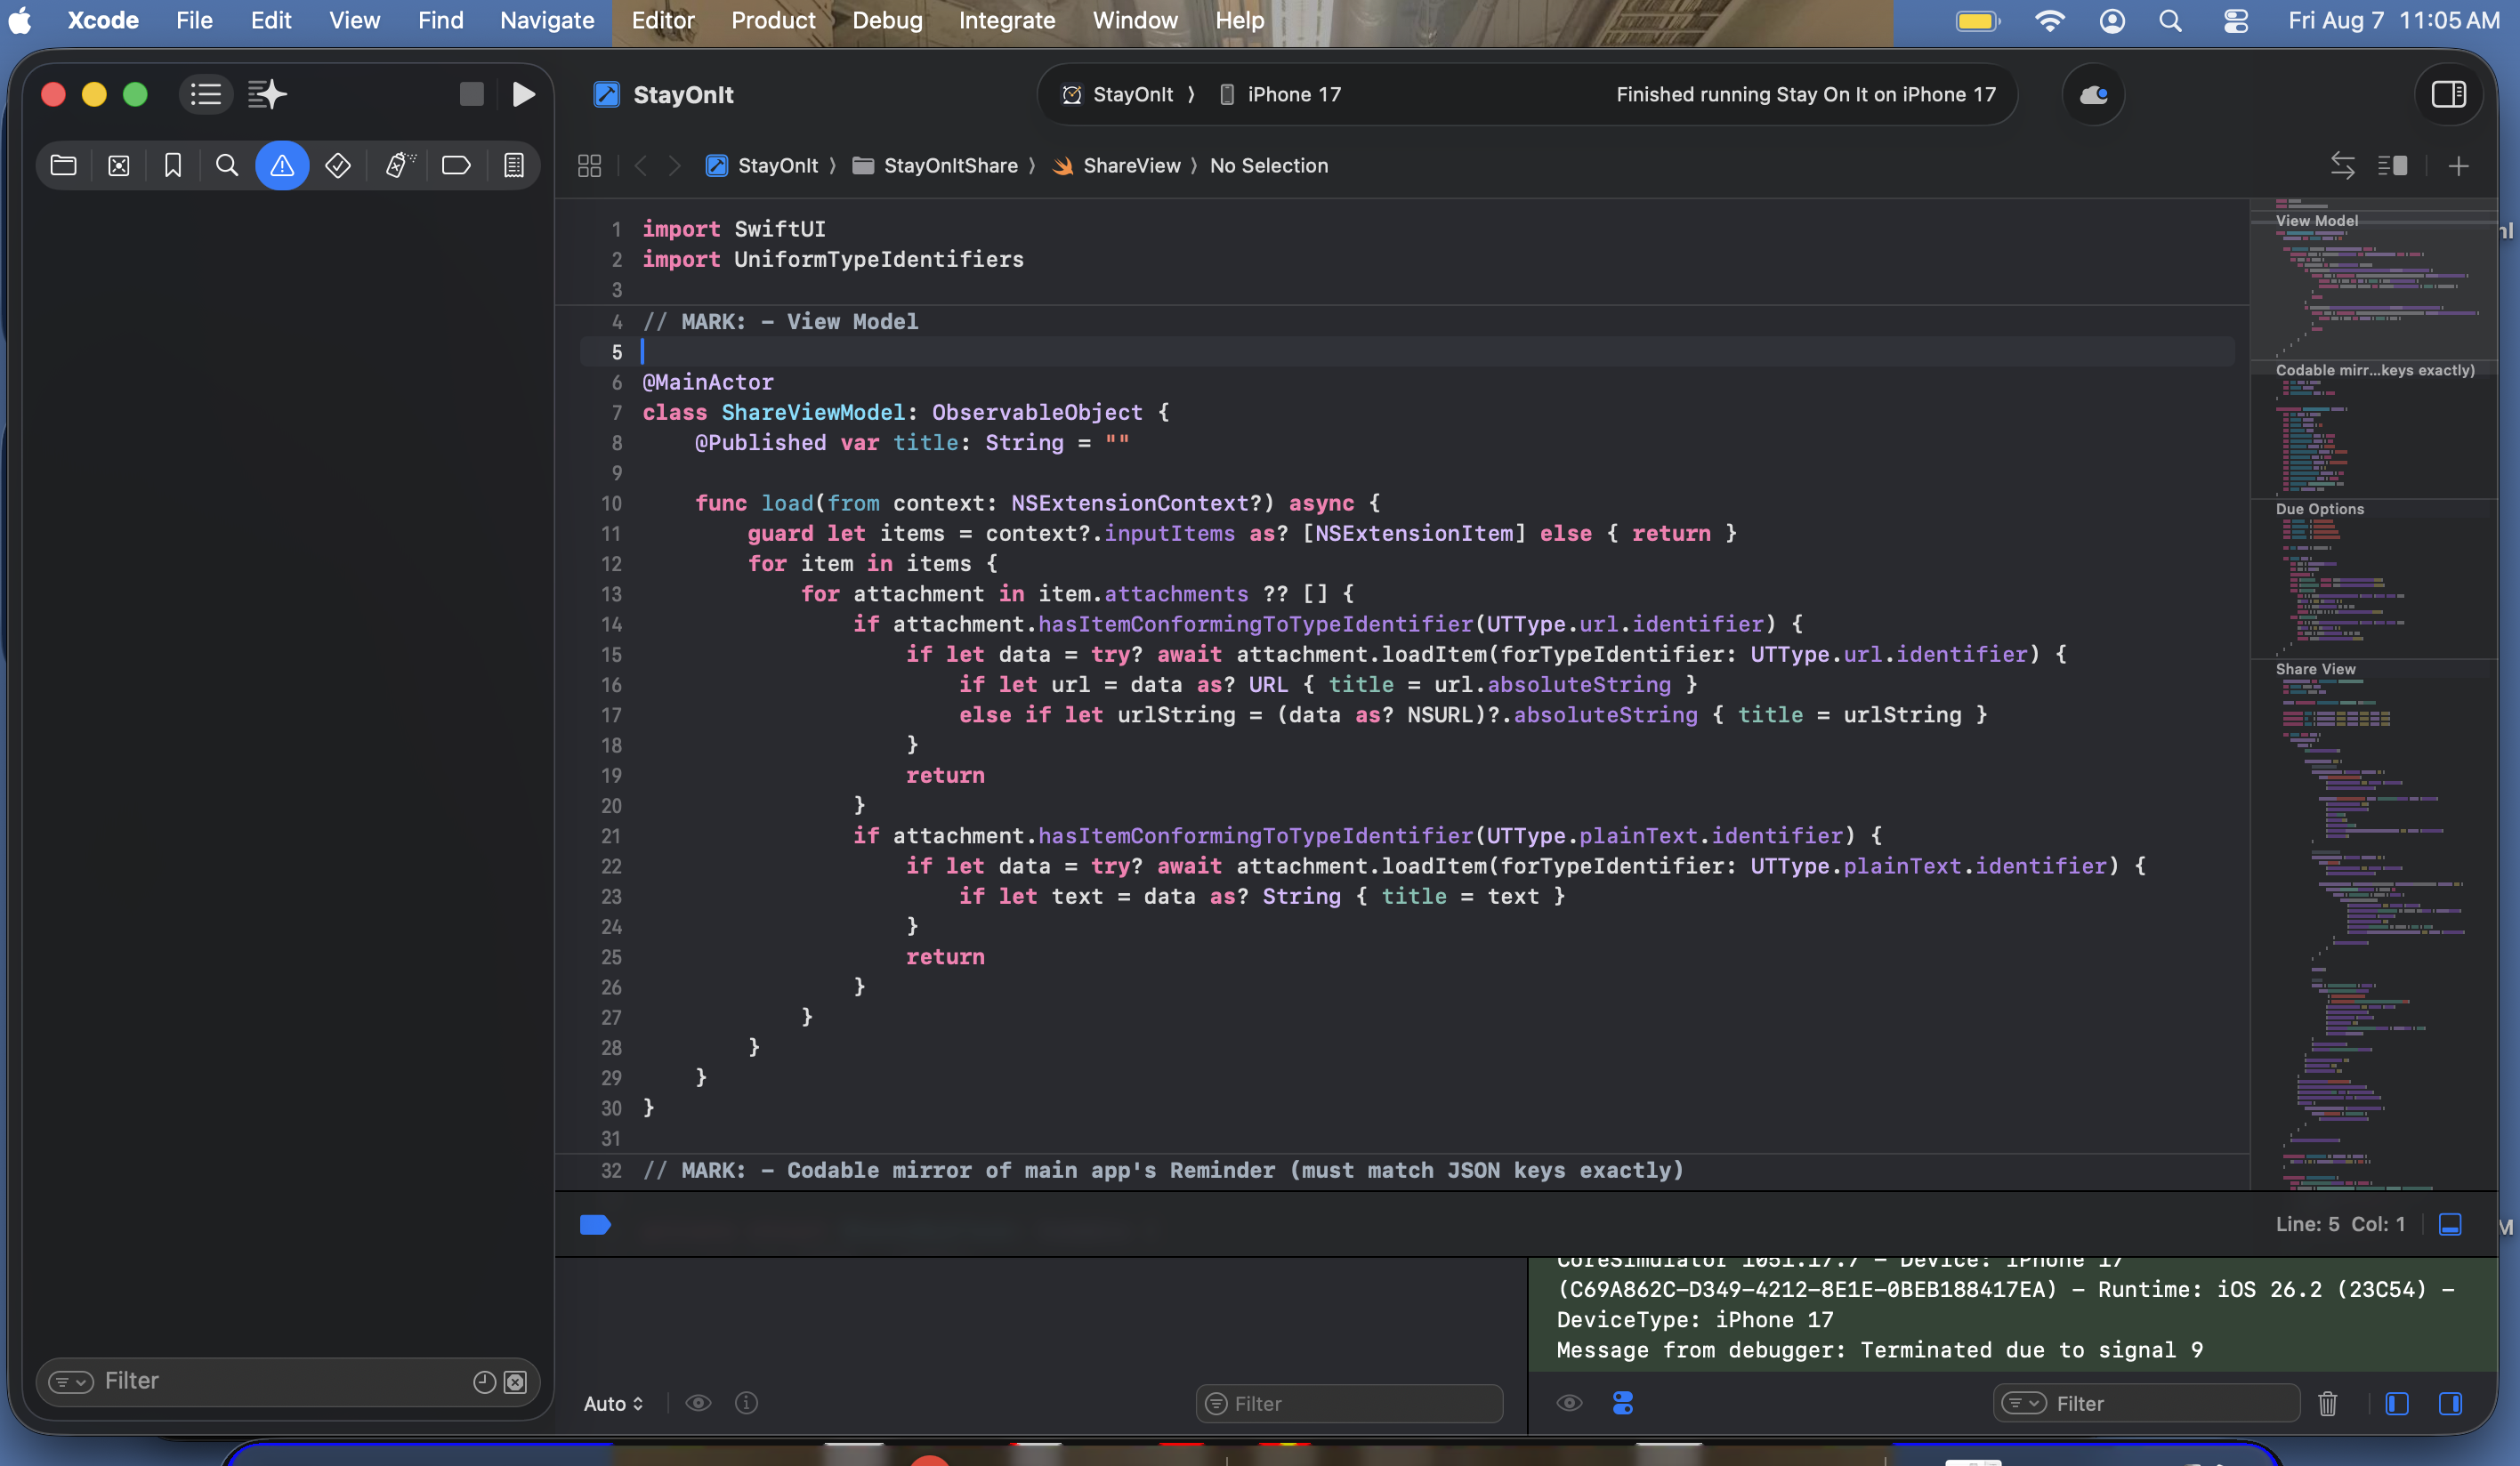
Xcode with the starter project open, Swift code visible
Starter project open in Xcode, ready to run
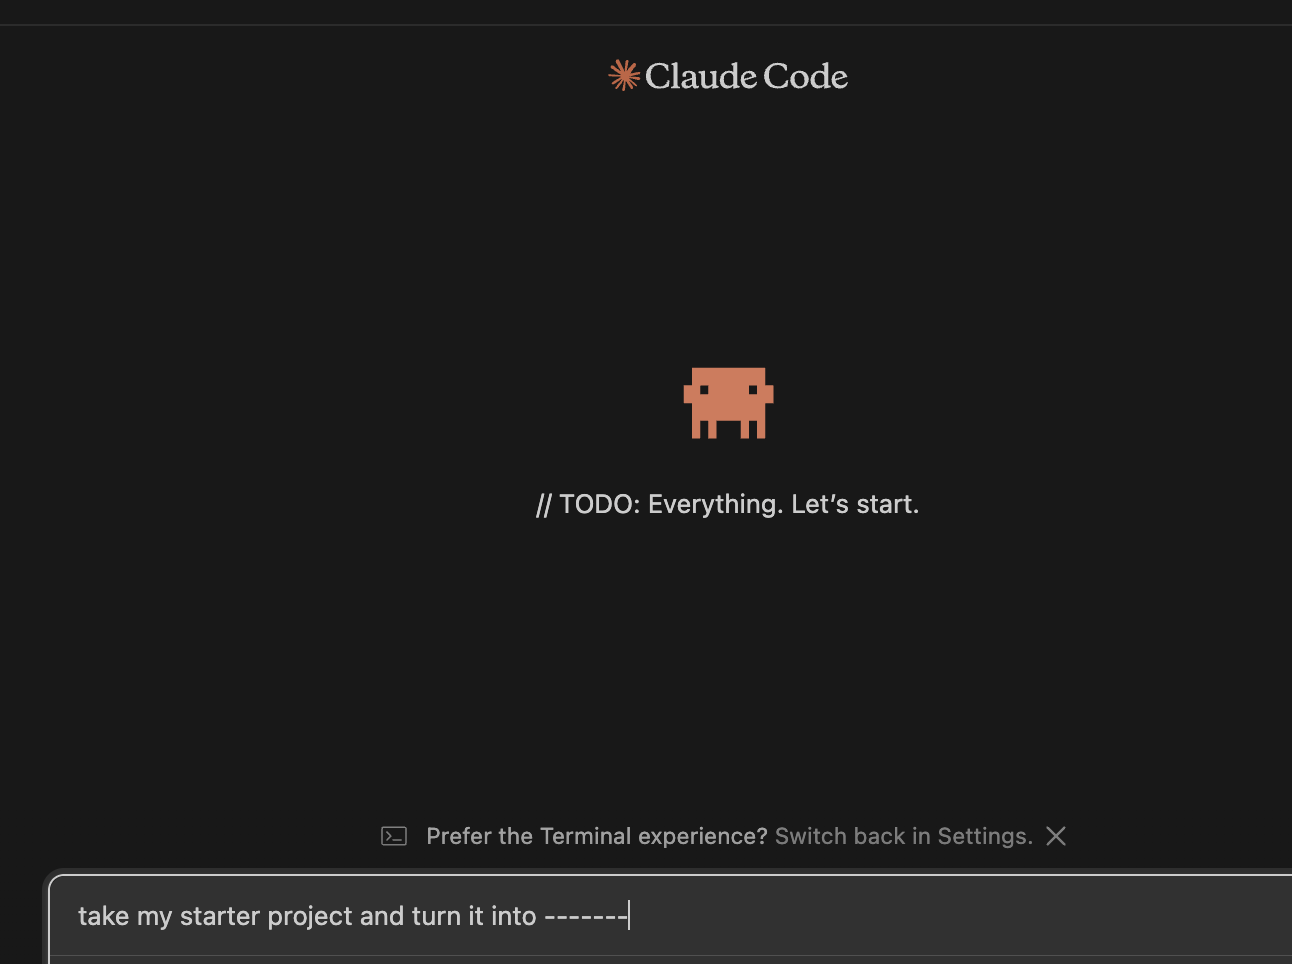
Claude Code extension in VS Code
Claude Code in VS Code: describe what you want, get working Swift
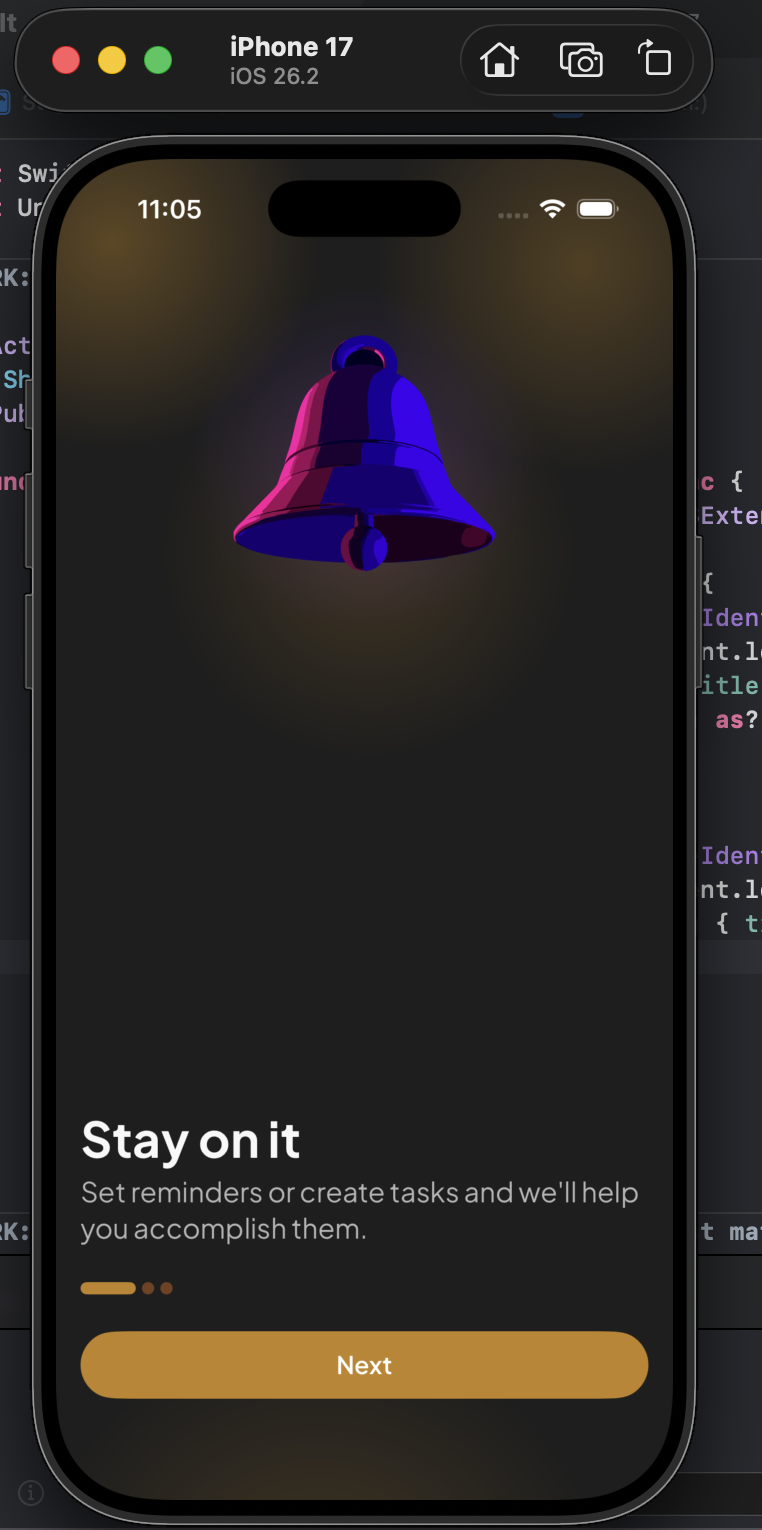
Finished app running in iPhone simulator
Your app running in the simulator in minutes
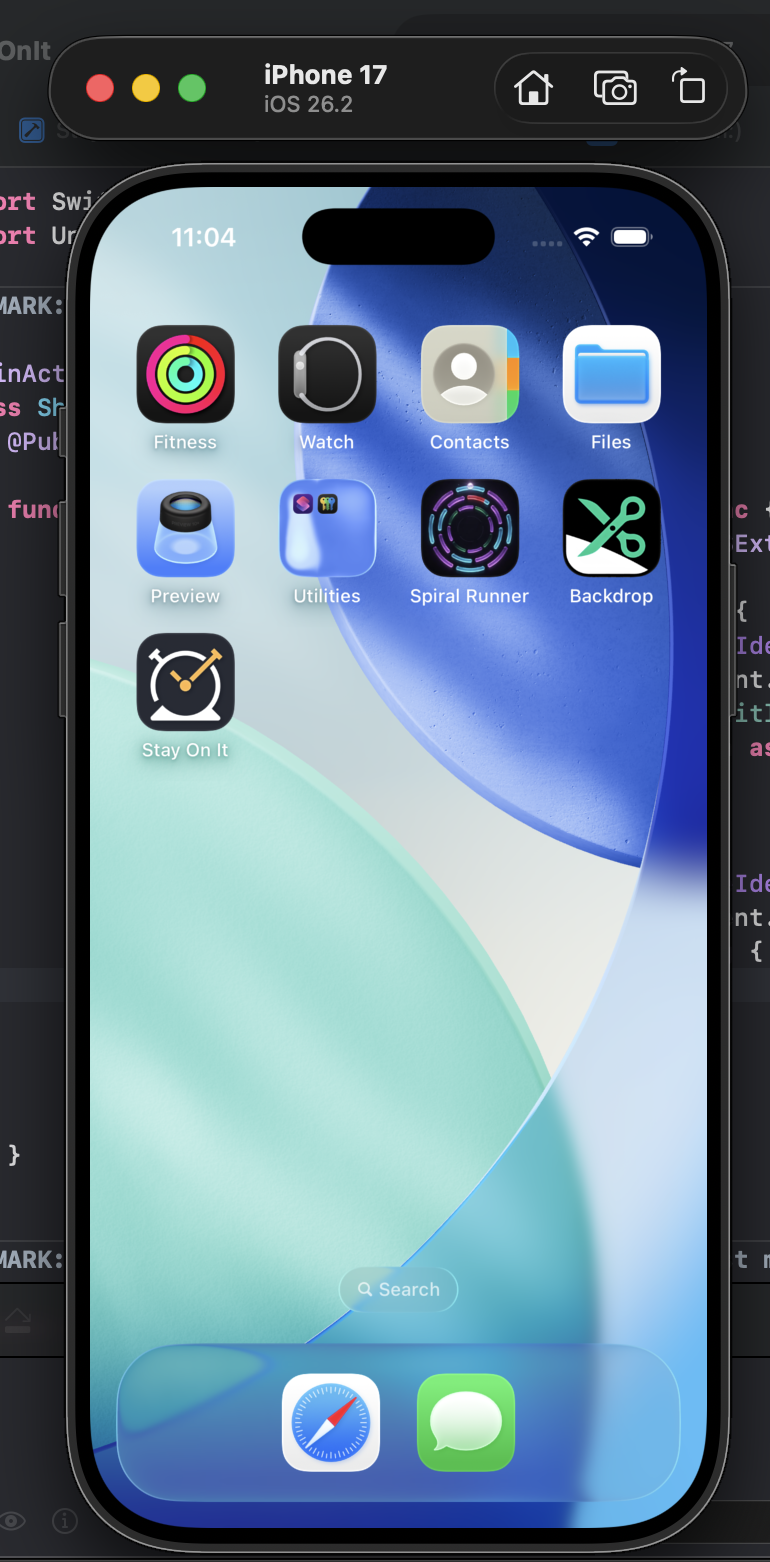
iPhone simulator home screen with the app installed
App installed on your iPhone, submitted to the App Store
📝
Grounded in official Apple documentation
Every step in this kit traces back to a real Apple document: the App Store Review Guidelines, the Human Interface Guidelines, or official API docs. Not blog posts. Not Stack Overflow from 2019. The actual source.
🔎
200+ App Store rules, pre-digested
Apple's App Store Review Guidelines are 200+ rules written in legal language. We've read all of them, pulled out every rule that matters for a first-time submission, and translated each one into plain English with the exact action required.
🚫
Zero guesswork on what Apple actually wants
Most rejections happen because developers assumed something was fine. This kit removes the assumptions. You'll know exactly what Apple expects at every stage, from your first commit to the moment your app goes live.

What you'll be able to do

Concrete skills by the time you finish the kit.

After Module 1
Build and run a real iOS app
Xcode set up, simulator running, your first blank app on screen before you've written any of your own code.
After Module 4
Design any screen in SwiftUI
Navigate between views, lay out content, style your brand colors and fonts, use SF Symbols (Apple's entire icon library, free).
After Module 5
Build an app that remembers things
User data that persists between sessions. A real product, not a prototype. Powered by SwiftData, Apple's latest persistence framework.
After Module 6
Charge for your app
In-app purchases and subscriptions wired up using StoreKit 2, Apple's official monetization framework. Understand what Apple takes and how to price it.
After Module 8
Test on a real iPhone
Your app installed on your own device via TestFlight. Catch what simulators miss before you submit to review.
After Module 9
Submit to the App Store
Every required screenshot, every metadata field, archive + upload complete. Your app in Apple's review queue.

The fastest way to build with this kit

Most people open Xcode and type. Here's the faster method, use VS Code + Claude Code alongside Xcode so Claude writes your Swift directly, you review it, and Xcode compiles it.

1
Download VS Code and the Claude Code extension
VS Code is a free code editor. The Claude Code extension connects it to Claude's AI: Claude can read every file in your project and edit them directly. No copy-paste, no switching tabs.
VS Code → code.visualstudio.com Extensions (⌘⇧X) → search "Claude Code"
2
Open your Xcode project folder in VS Code
In VS Code: File → Open Folder → select the folder that contains your .xcodeproj file. VS Code shows your entire project tree. Claude sees all of your .swift files and can read, write, and refactor them as a unit, the same way it built this site.
3
Describe what you want: Claude writes the code
Tell Claude what feature to build in plain English. It reads your existing views, matches your naming conventions, and writes code that fits in. You flip to Xcode, hit ⌘B to build, and run it in the simulator. The kit's modules give you the knowledge to know what to ask for, whether the output is correct, and how to direct Claude when it needs adjustment.
You
"Add a profile screen to ContentView. It should show the user's name and email from UserDefaults, an edit button that opens a sheet, and a sign-out button at the bottom."
Claude
Writes ProfileView.swift, adds the sheet with a form, wires up UserDefaults @AppStorage bindings, adds the tab to your ContentView, and shows you where each change landed.
4
Adding assets: images, icons, fonts, colors
Assets live in Xcode's Assets.xcassets: not in VS Code. Here's exactly how to add each type:
Images (PNG / JPG)
  1. Open Assets.xcassets in Xcode
  2. Right-click → New Image Set
  3. Name it (e.g. hero-banner)
  4. Drag your PNG into the or slot
  5. In SwiftUI: Image("hero-banner")
App Icon
  1. Export as 1024×1024 PNG
  2. No transparency (alpha channel): Apple rejects these
  3. In Assets.xcassetsAppIcon
  4. Drag into the single slot: Xcode generates all required sizes
  5. Check it on a real device before submitting
Brand Colors
  1. In Assets.xcassets, right-click → New Color Set
  2. Name it (e.g. brandGold)
  3. Set separate light and dark mode values
  4. In SwiftUI: Color("brandGold")
  5. Works in dark mode automatically
Custom Fonts
  1. Drag your .ttf or .otf into your project navigator
  2. Check "Add to target" in the dialog
  3. In Info.plist → add Fonts provided by application → add the exact filename
  4. In SwiftUI: Font.custom("FontName", size: 16)
  5. Use the PostScript name: check it in Font Book on Mac
5
Xcode error → paste to Claude → fixed
When Xcode shows a red error, click it, copy the full message with ⌘C, and paste it into Claude. Claude knows every common Xcode and SwiftUI error and will give you the exact one or two line fix. This alone makes the build loop dramatically faster than searching Stack Overflow.
You
"Cannot convert value of type 'String' to expected argument type 'Binding<String>': ProfileView.swift:34"
Claude
Change TextField("Name", text: name) to TextField("Name", text: $name). TextField takes a binding, not the value directly. The $ prefix creates the binding from your @State variable.
This is the actual workflow: kit as reference, Claude as the implementation engine. The modules aren't there to make you memorize Swift syntax. They're there so you understand what you're building well enough to direct Claude, catch mistakes, and make decisions. A developer who understands the architecture but uses AI to write the code ships five times faster than one who does both manually.

What are you building?

Select your app type and we'll show you which modules to focus on, and which to skip or save for later.

🛠️
Utility / Tool
Calculator, timer, converter, notes, weather
🎮
Game
Puzzle, casual, word, card, arcade
🏢
Business / Local
Restaurant, gym, salon, booking, loyalty
💬
Social / Community
Forum, group chat, reviews, dating
🛍️
Shopping / E-commerce
Store, marketplace, subscription box
🎧
Content & Media
Podcast, news reader, video, ebooks
📊
Productivity
Task manager, habit tracker, journal, planner
🤖
AI-Powered App
Smart assistant, coach, auto-categorization
Focus on
Optional
🕑  

The full curriculum

Sixteen modules in order. Each one ends with something that runs.

01
Dev Environment Setup
Install Xcode, configure your Apple Developer account, and run your first build before writing any of your own code.
Download Xcode from the Mac App Store (the only legitimate source: avoid third-party mirrors)
Create an Apple ID and enroll in the Apple Developer Program ($99/yr paid directly to Apple: what it unlocks and why it's required)
iOS Simulator setup: choose the right device, understand limitations vs. physical testing
Sign your first app target: provisioning profiles and certificates explained simply
Run your first blank app: confirm the toolchain works before you write any code
📄 References: Apple Developer Program Enrollment, Xcode Release Notes
30 min
02
Your Project Foundation: The Starter Kit
Download the iOS Labs SwiftUI template and learn how it's structured so you can change any part of it with confidence.
Project structure: what every folder, file, and group actually does
App entry point: the @main struct, App protocol, and how iOS launches your code
Navigation architecture: NavigationStack, TabView, and sheet modals: when to use each
Assets catalog: adding images, app icons, launch screens, and brand colors
Reusable component system: how the template is organized so your code doesn't turn into a mess
45 min
03
Planning Your App Before You Code
The step most people skip, and the one that causes the most wasted work. Define your app on paper before touching the code.
Screen mapping: list every screen your app needs and how users move between them
Data modeling: what your app needs to remember, and where it lives
MVVM pattern: Apple's recommended architecture: what it is and why it keeps code manageable
App Store positioning: thinking about your keywords, category, and competitors before you build (changing this after wastes time)
Apple Human Interface Guidelines overview: the design principles Apple reviewers judge your app against
📄 References: Apple Human Interface Guidelines (HIG)
30 min
04
Building Screens in SwiftUI
Build every screen your app needs using Apple's modern UI framework. By the end, your app looks like a real product.
VStack, HStack, ZStack: Apple's layout primitives, explained with real examples
SF Symbols: Apple's library of 6,000+ free icons: how to use, resize, and colorize them
Typography and color: applying your brand identity using the assets catalog you set up in Module 2
Lists, ScrollView, and LazyVGrid: laying out collections of content efficiently
Buttons, text fields, toggles, pickers: wiring up interactive controls
Sheets, navigation links, alerts: how users move through and out of screens
Animations: simple motion that makes your app feel polished without extra work
HIG compliance checkpoints: confirm your UI meets Apple's design standards before submission
📄 References: SwiftUI Documentation, Apple Human Interface Guidelines
2 hrs
05
Data, State & Persistence
Make your app remember things between sessions. This is where a set of static screens becomes a real product.
@State: simple UI state that lives inside one view
@Observable and @ObservableObject: shared state that multiple views can read and update
UserDefaults: lightweight key-value storage for settings and preferences
SwiftData: Apple's newest persistence framework for structured data: the modern replacement for Core Data
Codable and JSON: reading and writing structured data from files or APIs
Async/await: fetching data from the network without freezing the UI
Form handling and input validation: processing what users type correctly
📄 References: SwiftData Documentation, Swift Concurrency Guide
1.5 hrs
06
Monetization with StoreKit
Charge for your app using StoreKit 2, Apple's official in-app purchase framework.
Four ways to monetize: paid upfront, one-time in-app purchase, consumable purchase, auto-renewable subscription
StoreKit 2 setup: configuring products in App Store Connect, linking them in Xcode
Paywall implementation: gating features behind a purchase
Restoring purchases: Apple requires this: how to implement it correctly to avoid rejection
Apple's 30% commission: what it means for your pricing strategy at different price points
App Store Review Guideline 3.1: the in-app purchase rules Apple enforces strictly
Testing purchases in Sandbox: how to test without being charged
📄 References: StoreKit 2 Documentation, App Store Review Guidelines §3.1
45 min
07
Backend & Auth (Optional)
Add cloud data and user accounts. Skip this entirely if your app works offline.
Sign in with Apple: required by App Store Review Guideline 4.8 if you offer any other social login: how to implement it
Firebase Firestore: cloud database setup, reading and writing data from SwiftUI
Supabase as an alternative to Firebase: open source, easier pricing model
Push notifications via APNs: Apple's push server, certificates, and sending your first notification
When you actually need a backend (and when you don't): decision framework to save weeks of unnecessary work
📄 References: App Store Review Guidelines §4.8, Apple Push Notification service Docs
1 hr
08
Testing on a Real Device with TestFlight
Get your app on your actual iPhone for the first time and share it with real testers before you submit.
Archive and upload: the exact Xcode steps to package your app for distribution
TestFlight internal testing: install your build on your own device in minutes
External testers: invite up to 10,000 people via email: share with friends, early customers, anyone
Reading crash reports in Xcode Organizer: understand what went wrong and where
What simulators miss: real device behaviors that only show up on hardware (touch precision, camera, GPS, memory pressure)
Feedback collection from testers: what to ask for, what to ignore before v1
📄 References: TestFlight User Guide, Xcode Organizer Documentation
30 min
09
App Store Connect: Complete Submission Walkthrough
Every field, every required screenshot, every setting. By the end of this module your app is in the review queue.
App name and subtitle: Apple's 30-character limits and keyword indexing rules
Keywords field: 100-character limit, how Apple's search algorithm uses them, what not to include
Screenshots: every required device size (iPhone 6.9", 6.5", 5.5" minimum): using the included templates
App preview video: optional but powerful: specs, what works, what to avoid
Age rating questionnaire: what each question actually means and the correct answer
Privacy policy: why Apple requires it, what it must cover, and a template you can use
App Privacy (nutrition label): declaring every type of data your app collects: this is audited
Pricing and availability: free vs. paid, territories, release date options
Review notes: what to tell the reviewer: and what you're required to include for certain app types
📄 References: App Store Connect Help, App Store Review Guidelines §1-5
1 hr
10
The Apple Review Process: What Actually Happens
Most people submit and wait nervously with no idea what's happening. This module tells you exactly what Apple checks and why.
What the automated checks look for: crashes, missing metadata, policy violations flagged by Apple's system
What human reviewers actually test: they install the app and use it: exactly what they look for
Timeline: 24–48 hours for most apps, when it can take longer, and how to check your status
Resolution Center: how to reply to a rejection, what to say, and how to appeal
Expedited review: when you can request one (bug fixes, legal urgency) and how to do it
Phased release: rolling your app out to 1% → 100% of users over a week as a safety net
📄 References: App Store Review Guidelines, App Store Connect Help: Review Process
30 min
11
Rejections & Errors: The Fix Reference
A searchable reference for what's most likely to go wrong, before and after submission.
Guideline 2.1: App Completeness: placeholder content, broken features, demo mode rejections and how to fix them
Guideline 4.3: Spam: what makes Apple flag your app as "similar to existing apps" and how to differentiate
Guideline 5.1.1: Data Collection: missing privacy policy, undeclared data collection, inaccurate nutrition label
Guideline 3.1: In-App Purchases: using external payment links, missing restore button, sandbox failures
Guideline 1.5: Developer Information: missing support URL, missing contact details
8 more common rejections with the exact resolution for each
Xcode build error reference: code signing failures, provisioning profile mismatches, Swift compiler errors, archive issues
📄 References: App Store Review Guidelines (full text), Xcode Release Notes
45 min
12
Cloudflare Workers: Serverless Backend
Build a real API backend without managing a server. Cloudflare Workers runs your JavaScript on their global edge network. Free tier covers 100,000 requests per day, enough to carry most apps well past launch.
What serverless means: code that runs on demand with no server to maintain, patch, or scale. You write a function, Cloudflare handles everything else
Writing your first Worker: the fetch handler pattern, URL routing with URLSearchParams, and returning JSON responses your iOS app can decode with Codable
CORS headers: the exact headers your Worker needs so your iOS app can call it without network errors: and why the OPTIONS preflight request matters
KV storage: Cloudflare's key-value store for simple per-user data, rate limit counters, session tokens, user preferences: no database setup or connection strings
D1 database: full SQLite at the edge. Create tables, run SQL queries, store structured app data. Included free with Cloudflare's paid plan ($5/month)
API proxy pattern: the most important Worker use case: hide your third-party API keys (Stripe, Anthropic, any service) from your iOS binary by routing all sensitive calls through the Worker
Calling from iOS: URLSession with async/await, Codable response decoding, and proper error handling for network responses
Deploy with Wrangler CLI: one command deploys your Worker to 300+ edge locations globally: wrangler deploy
📄 References: Cloudflare Workers Docs, Wrangler CLI Reference, D1 Database Docs, KV Namespace Docs
1 hr
13
Firebase: Real-Time Data, Auth & Storage
Add user accounts, live-syncing cloud data, and file storage to your app. Firebase's Spark plan is completely free and covers most apps through the first significant user milestone.
Firebase Auth on iOS: Sign in with Apple (required by App Store Review Guideline 4.8 if you offer any other social login), Google Sign-In, and email/password: implemented in under 50 lines of SwiftUI
Firestore data model: collections, documents, and subcollections: how NoSQL structure differs from SQL and how to design your data for an iOS app
Reading data: one-time fetch with getDocument() and real-time streaming with addSnapshotListener(): your SwiftUI view updates automatically when any document changes
Writing data: setData() for create/replace, updateData() for partial updates, addDocument() for auto-ID records, and FieldValue.serverTimestamp() for consistent timestamps
Offline support: Firestore caches all data locally by default. Your app works with no internet and syncs automatically when connected: no code required on your part
Security Rules: protecting your Firestore database with declarative server-side rules. Users can only read their own documents, write operations are validated: all without a custom backend server
Firebase Storage: upload user photos and files with a real-time progress indicator. Storage Security Rules prevent users from reading or overwriting each other's files
Cost model: Spark (free) vs Blaze (pay-as-you-go). Which operations hit the free quota fastest and how to set budget alerts before you're charged anything
📄 References: Firebase iOS SDK Docs, Firestore Security Rules Reference, Firebase Authentication Docs
1.5 hrs
14
AI Features with Claude: The Highest-Leverage Upgrade
AI is the single best way to make your app significantly more valuable than a competitor's. This module covers the correct architecture for using Claude in a live iOS app and the most impactful features you can build in a weekend.
What Claude can do for your app: smart search that understands intent, content generation, automatic categorization, personalized recommendations, conversational interfaces, data extraction from text or images
The security rule: never call the Anthropic API directly from your iOS app. Your API key would be extractable from the binary. Always route through your Cloudflare Worker from Module 12
Building the AI proxy Worker: accept a request from your iOS app, forward it to Claude's messages API, return the response: complete Worker code included, deploys in minutes
Streaming responses: display Claude's reply token-by-token as it arrives using URLSessionDataDelegate on iOS: the same real-time typewriter feel as Claude.ai, in your app
System prompt design: how to write the system prompt that makes Claude behave exactly right for your feature. The difference between a useful AI feature and a frustrating one is almost entirely in the system prompt
Tool use (function calling): get structured JSON back from Claude instead of prose. Essential for any feature that needs to take actions based on Claude's output, not just display text
Using Claude as your coding partner throughout the entire kit: Claude writes SwiftUI code, debugs Xcode errors, designs your Firestore data model, drafts your App Store description, keywords, and privacy policy: the first 13 modules go significantly faster with it
Pricing reality: Claude Haiku 3.5 costs roughly $0.0008 per typical request. 1,000 users making one AI request per day is about $24/month: comparable to basic cloud hosting
Rate limiting with Cloudflare KV: track per-user request counts in your Worker to prevent abuse and keep costs predictable
📄 References: Anthropic API Documentation, Claude Models Overview, Messages API Reference
1 hr
15
Optional
Widgets & Push Notifications
Two high-impact features to add after launch. Home screen widgets surface your app's content without users opening it. Push notifications bring them back.
WidgetKit: Apple's framework for home screen and lock screen widgets using SwiftUI views and timeline entries
Timeline providers: how widgets refresh on schedule or in response to app events, and the entry-based update model
App groups: the shared data container that lets your app and widget read the same UserDefaults and files (required for showing live data in a widget)
Small, medium, and large widget sizes: design considerations and what content works at each size
Push notifications setup: creating an APNs key in your Apple Developer account, registering for remote notifications in your iOS app
Requesting notification permission: Apple's two-step prompt system, provisional authorization, and when to ask (not at app launch)
Firebase Cloud Messaging (FCM): sending push notifications from a Cloudflare Worker to a specific user's device: the complete server-side implementation
Rich notifications: images, action buttons, and notification service extensions for custom content before display
📄 References: WidgetKit Documentation, UserNotifications Framework, Apple Developer: Push Notifications
1.5 hr
16
Optional
App Store Optimization (ASO)
Most apps fail not because the code is bad but because nobody finds them. ASO is how you improve your app's ranking, click-through rate, and conversion inside the App Store. Done right it compounds: better ranking brings more downloads, which improves ranking further.
App name (30 chars): where to put your primary keyword and why the first word carries 3× the ranking weight of words later in the title
Subtitle (30 chars): your second-best keyword phrase. Never repeat a word from your app name here: Apple counts them once
Keyword field (100 chars, comma-separated): how to stack non-redundant keywords, what Apple's algorithm ignores, and where to find what people actually search for
Screenshots: why the first screenshot is the only one 85% of users see, what text overlay converts vs. what kills conversions, and the structure for each position in the sequence
App preview video: when a video lifts conversion and when it actively hurts it (low-production video is consistently worse than no video)
Ratings: SKStoreReviewRequest API, when to trigger it (after a success moment, not at launch), how Apple's 90-day cap works, and what rating velocity does for ranking
Getting featured: what the App Store editorial team looks for and how to submit your app for editorial consideration
Localization as ASO leverage: translating your metadata (not your app) into the top 5 markets can double impressions with a few hours of work and a single translation API call
Product Page Optimization: A/B testing screenshots and icons directly in App Store Connect, reading the results, and when to iterate
📄 References: App Store Connect Help (Product Page Optimization), Apple Search Ads Documentation, App Store Review Guidelines §2.3
1 hr
Total guided time ~15.5 hours, one focused day

Built on official Apple sources

This kit doesn't interpret third-party opinions. Every guideline, every rule, every technical detail traces back to Apple's own published documentation.

Design Standards
Apple Human Interface Guidelines
Apple's official design standards covering layout, typography, navigation, color, and platform conventions. Reviewers check your app against these. Module 3 covers the rules that matter most for a first submission.
Review Rules
App Store Review Guidelines
200+ rules Apple applies to every submitted app. Written in legal language, hard to parse. Modules 9–11 translate every rule relevant to your build into plain English with a clear action.
Submission
App Store Connect Help
Apple's official guide for the submission portal: screenshots, metadata, pricing, and the archive upload flow. Module 9 walks through every required step in order.
UI Framework
SwiftUI Documentation
Apple's modern, declarative UI framework: the official recommended approach for all new iOS apps. Every view, modifier, and layout pattern in the kit is drawn from Apple's own API documentation.
Beta Testing
TestFlight User Guide
Apple's free beta distribution platform. Module 8 covers the exact TestFlight workflow from archive to device install to external tester invite.
Monetization
StoreKit 2 Documentation
Apple's current in-app purchase and subscription framework. Module 6 covers the StoreKit 2 implementation pattern and the App Store Review Guidelines rules that govern purchases (§3.1).

Not affiliated with Apple. iOS Labs is an independent development studio. All Apple documentation referenced in this kit is publicly available at developer.apple.com. We interpret and simplify it. Apple publishes it.

Mistakes this kit prevents

These aren't hypothetical. They're the exact things that kill first submissions, usually discovered hours after hitting submit.

Starting with UIKit instead of SwiftUI
UIKit is the older framework: harder to learn, more code for the same result. Apple's own docs steer new developers to SwiftUI. The kit starts you on SwiftUI from minute one.
Building before setting up a Developer account
You can't submit without one. You can't test on a real device without one. Enrollment takes up to 48 hours. Module 1 has you set it up first so it doesn't block you at the end.
Missing required screenshot sizes
Apple requires screenshots for specific device sizes: iPhone 6.9" is now mandatory. Missing a required size blocks submission entirely. The included templates have every size pre-sized.
Submitting without a privacy policy
Apple requires a support URL and privacy policy for all apps. You get rejected at the metadata stage if it's missing: before a reviewer even sees your app. A template is included in Module 9.
Using non-Apple social login without Sign in with Apple
Guideline 4.8: if your app offers Google or Facebook login, it must also offer Sign in with Apple. Module 7 covers the implementation so you don't get rejected for something fixable.
No restore purchases button
Apple requires every app with in-app purchases to include a "Restore Purchases" button: and will reject you without one. Module 6 includes the implementation.
Inaccurate App Privacy nutrition label
The App Privacy section in App Store Connect declares what data your app collects. Apple cross-checks this. Getting it wrong is a rejection: and can be a legal issue. Module 9 walks through every field.
Linking to external payment from inside the app
Sending users outside the app to pay on a website bypasses StoreKit and violates Guideline 3.1. Apple is strict about this. Module 6 shows you the correct pattern and what you can and can't link to.

Who this is for

You don't need to be a developer. You need to be willing to spend a focused day on it.

Business owners with an app idea
You want a mobile presence for your business but can't justify paying $600+ for a developer yet. This gets you there yourself.
Restaurant or cafe loyalty apps
Booking or scheduling tools
Service menus and price lists
Client portals and resources
Side project and startup builders
You have an app idea you've been sitting on. You've started YouTube tutorials but never shipped anything. This gets you to a submitted app.
Utility and productivity apps
Niche tools for a specific audience
Companion apps for an existing product
Subscription or content apps
Developers new to iOS
You code in another language, web, Python, backend: and want to ship your first iPhone app without relearning everything from scratch.
Web developers crossing to native
Backend engineers wanting a front end
React Native devs going fully native
Freelancers expanding to iOS work

Which language is right for iOS?

Before you start, here's the honest breakdown of every option, and why this kit uses Swift + SwiftUI.

UIKit
Apple's legacy UI framework
The original iOS UI framework, used before SwiftUI. Still supported and still required for some very advanced use cases (custom animations, specific accessibility features, older iOS targets). Most new apps have no reason to use it.
Finer low-level control over custom drawing and gestures
Required when targeting iOS 12 or earlier
Vast existing tutorials: but many are now outdated
Can be mixed with SwiftUI in the same project
Objective-C
Apple's legacy language
The language iOS was built in before Swift. Still compiles and runs fine, and you'll encounter it in older codebases and some libraries. No reason to learn it for a new project: Swift does everything Objective-C can, plus more.
Necessary for maintaining pre-2014 codebases
Interoperable with Swift: you can mix both in one project
Harder syntax, more verbose: high learning overhead
No new Apple tutorials use it
React Native
JavaScript / TypeScript: cross-platform
Write once, deploy to iOS and Android. Uses JavaScript or TypeScript: familiar if you're a web developer. The UI is not native (it renders via a bridge), which shows in animation smoothness and access to new iOS features.
One codebase covers iOS and Android
Familiar for web developers
New Apple features lag 6–18 months behind Swift availability
More complex debugging: JS bridge adds failure points
Flutter
Dart: cross-platform, by Google
Google's framework for building iOS and Android apps from one codebase using the Dart language. Strong UI toolkit with its own rendering engine (Skia/Impeller): not native UIKit/SwiftUI, so some interactions feel slightly off to iOS users.
iOS + Android from one codebase
Expressive UI toolkit, consistent look across platforms
Custom rendering engine: not UIKit/SwiftUI native behavior
Dart is a Google language with a smaller community than Swift
Language / Framework App Store approved Native iOS performance Full Apple API access Covers iOS + Android Beginner-friendly
Swift + SwiftUI ★ ✓ Yes ✓ Yes ✓ Full iOS only ✓ Yes
Swift + UIKit ✓ Yes ✓ Yes ✓ Full iOS only Moderate
Objective-C ✓ Yes ✓ Yes ✓ Full iOS only Hard
React Native ✓ Yes Partial Delayed ✓ iOS + Android Moderate
Flutter (Dart) ✓ Yes Partial Delayed ✓ iOS + Android Moderate

★ This kit uses Swift + SwiftUI exclusively.

How it compares

Other options give you pieces. This gives you the complete path.

iOS Labs Kit
$49
No experience required
16 sequential guided modules
Full App Store submission walkthrough
Official Apple doc references throughout
Rejection reasons + exact fixes
StoreKit monetization guide
Screenshot + metadata templates
SwiftUI starter project
Apple review process explained
Lifetime updates
SwiftUI Boilerplate ($99+)
$99+
Requires existing Swift knowledge
No guided build modules
No App Store submission guide
No Apple doc references
No rejection reference
Richer code (auth, paywalls, AI), for devs who already know Swift
YouTube Tutorials (Free)
$0
No sequential path to App Store
No submission walkthrough
Conflicting advice across channels
Many tutorials are outdated (pre-2023)
No rejection or error reference
Great for individual concepts, not for end-to-end shipping

What could your app earn?

Run the numbers before you build. Adjust price and volume to see take-home figures after Apple's cut.

App price
$2.99
Downloads / month
500
Gross revenue
$1,495
Apple's cut (30%)
$449
Your take / month
$1,047
Recoup the $49 kit
2 downloads

Apple takes 15% (not 30%) for developers earning under $1M/year via the Small Business Program. Subscriptions after 12 months also drop to 15%. Numbers above use 30% to stay conservative. IAP mode assumes 3% conversion from monthly active users.

Common questions

Everything you're probably wondering before buying.

Do I need coding experience to build an iPhone app?+
No. The iOS Labs Kit works for people with no prior coding or iOS development experience. Each module explains concepts from the ground up, and the SwiftUI starter project gives you a working foundation without starting from scratch. Module 1 literally starts from "open your Mac and download Xcode."
How long does it actually take to build an iPhone app?+
The 16 guided modules total roughly 15.5 hours. Modules 1–11 take you from Xcode setup to a submitted app: completable in one focused day. Modules 12–16 cover backend, AI, widgets, and ASO, which you can work through after your first submission. Apple's review process then takes 24–48 hours for most apps (occasionally up to 3 business days).
How do I submit my app to the App Store?+
Module 9 covers the full App Store Connect walkthrough, following Apple's official App Store Connect Help documentation: screenshots (every required size and device), app name, subtitle, keywords, description, age ratings, privacy policy, App Privacy data declarations, pricing, and the archive + upload process from Xcode. A metadata template is included so you're not starting from a blank form.
What is SwiftUI and why does the kit use it?+
SwiftUI is Apple's modern, official framework for building iOS apps. Introduced in 2019 and Apple's recommended approach for all new apps since 2023. Apple's own documentation and WWDC sessions are built around SwiftUI. It's significantly faster to learn than the older UIKit approach and produces native apps that perform well and pass App Store review. The entire starter kit uses SwiftUI.
How much does it actually cost to publish an app?+
Beyond the $49 kit, you need an Apple Developer account at $99/year, paid directly to Apple at developer.apple.com. That's the only required ongoing cost. There are no per-app fees, no commissions on free apps, and no hosting costs for apps that work offline. If you sell anything in your app using StoreKit, Apple takes 30% of each transaction (15% if you earn under $1M/year).
Why did Apple reject my app and how do I fix it?+
Module 11 covers the 12 most common App Store rejection reasons drawn directly from Apple's App Store Review Guidelines: Guideline 2.1 (App Completeness), Guideline 4.3 (Spam), Guideline 5.1.1 (Privacy), Guideline 3.1 (In-App Purchases), and more, each with the exact resolution. Most rejections can be fixed and resubmitted within a few hours using the Resolution Center in App Store Connect.
How do I make money from my app?+
Module 6 covers all four monetization models Apple supports: paid upfront, one-time in-app purchase, consumable purchase, and auto-renewable subscriptions. You'll implement a working paywall using StoreKit 2 (Apple's official in-app purchase framework) and understand how to price around Apple's 30% commission. Sandbox testing is included so you can test purchases without real charges.
How is this different from free YouTube tutorials?+
YouTube tutorials teach individual concepts but almost never take you through App Store submission. You end up piecing together conflicting advice from different channels, many of which are pre-2023 and reference frameworks Apple has deprecated. The iOS Labs Kit is a complete sequential path built on current Apple documentation: starter project, 16 modules, App Store walkthrough, backend guide, and rejection fixes that all work together.
What does the Apple review process actually look for?+
Module 10 explains exactly what happens: automated checks first (crashes, metadata, policy flags), then a human reviewer who installs your app and tests it against the App Store Review Guidelines. The module covers what reviewers look for, how to use App Store Connect Resolution Center to respond to rejections, how to request an expedited review, and how phased release works once you're approved.
What official Apple documentation does the kit reference?+
The iOS Labs Kit is built on Apple's official published documentation: the Human Interface Guidelines, the App Store Review Guidelines (200+ rules Apple checks), App Store Connect Help, the SwiftUI and Swift docs, the TestFlight User Guide, and the StoreKit 2 documentation. Every major step cites its source so you can verify it yourself at developer.apple.com.
Can I use Claude (AI) to help me build the app?+
Yes, and Module 14 covers this in detail. Claude is probably the most useful tool available to a first-time iOS developer right now. Paste a SwiftUI error message and get the exact fix. Ask it to write a Firestore query for your data structure. Have it draft your App Store description, keywords, and privacy policy. The modules go noticeably faster with Claude alongside them, and Module 14 shows you how to build AI features directly into your app using Claude's API through a Cloudflare Worker backend.

Stop guessing. Ship your app.

16 guided modules. Official Apple docs. Serverless backend. Firebase. AI with Claude. Widgets, push notifications, and ASO. A working SwiftUI project, complete App Store walkthrough, and post-launch guide. $49, one-time, yours forever.

Already a member? Sign in →